


Introduction
OpenID Connect (OIDC) is a modern authentication protocol built on top of OAuth 2.0. It enables secure identity verification and user information exchange between a Client (Application) and an Identity Provider (IdP).
OIDC is widely used in web and mobile apps to support Single Sign-On (SSO), especially with providers like Google, Microsoft, Okta, and Auth0.
🧭 Step-by-Step Breakdown: Authorization Code Flow
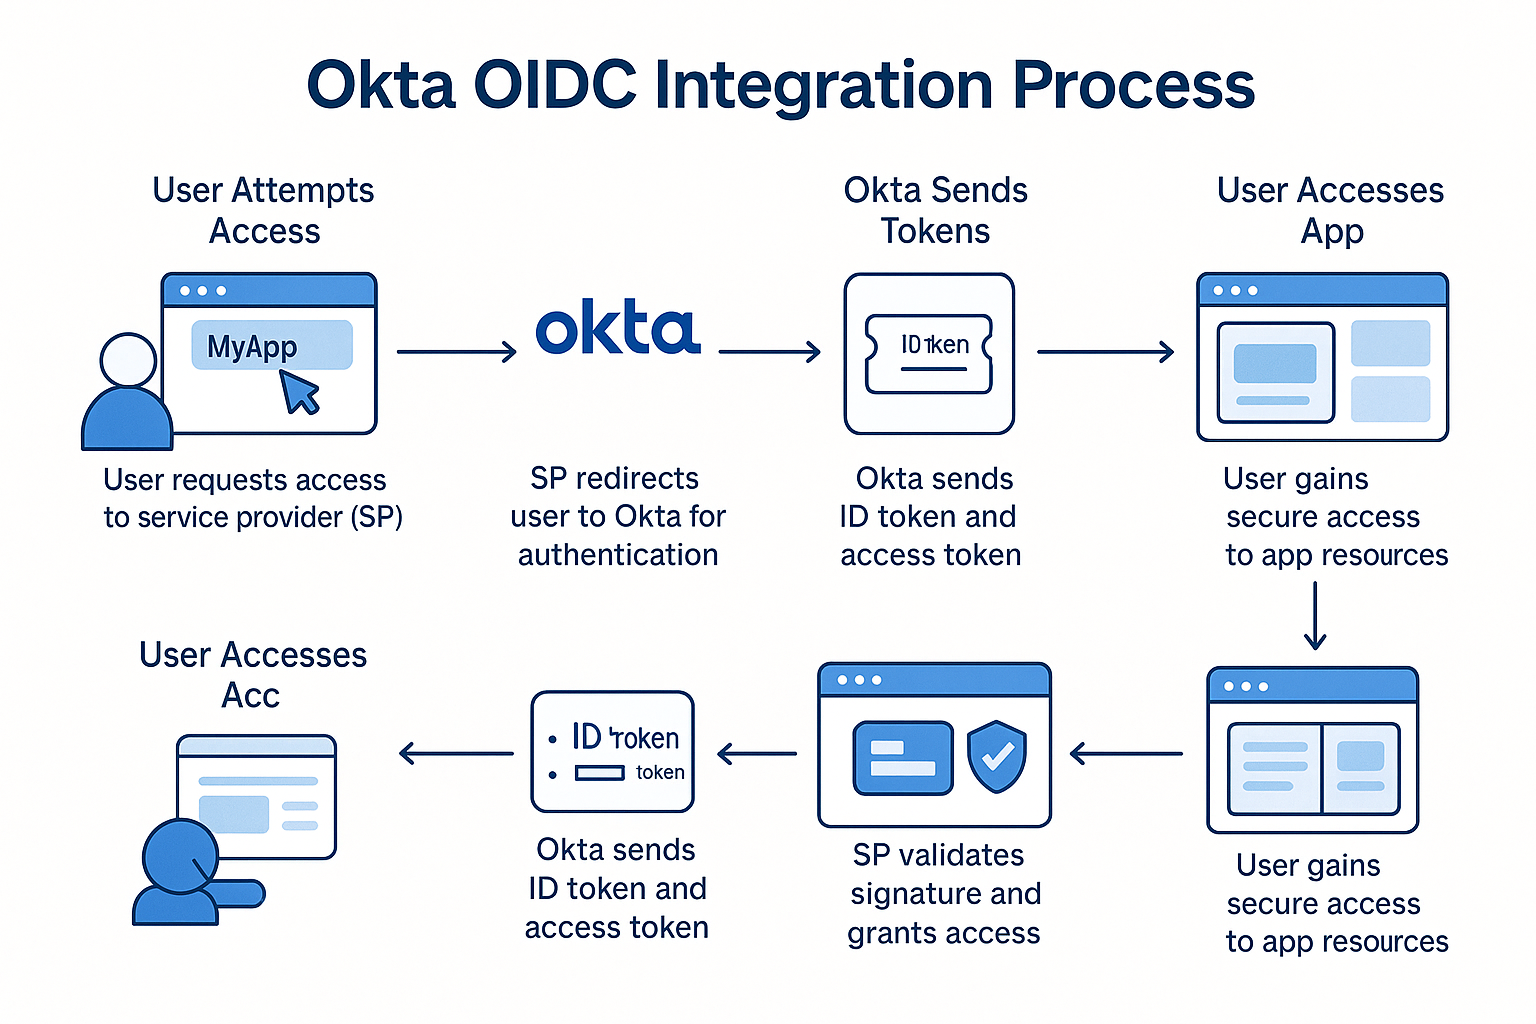
1. User Attempts to Log In
- The user visits your website and clicks “Log in.”
- The website (acting as the OIDC Client) initiates authentication by redirecting the user to the Identity Provider (IdP).
2. Redirect to Authorization Endpoint
- The client constructs a URL pointing to the IdP’s authorization endpoint, including:
client_idredirect_uriresponse_type=codescope=openid(plus optional:profile,email)stateandnoncefor security
- The user is redirected to this URL in their browser.
3. User Authenticates at the IdP
- The IdP displays a login prompt (e.g., username/password, MFA).
- Once authenticated, the IdP redirects the user back to the client via the
redirect_uri, including:- An authorization code
- The
stateparameter for CSRF protection
4. Client Exchanges Code for Tokens
- The client sends a POST request to the token endpoint of the IdP with:
- The authorization code
client_idandclient_secret(or private key for confidential clients)redirect_urigrant_type=authorization_code
- The IdP responds with:
- ID Token (JWT with user identity)
- Access Token (for accessing APIs)
- Optionally, a Refresh Token
5. ID Token Validation
- The client validates the ID Token, checking:
- Signature (using IdP’s public key)
- Issuer (
iss) - Audience (
aud) - Nonce
- Expiration (
exp)
- If valid, the user is authenticated.
6. User Session Established
- The client creates a local session (e.g., cookie or JWT).
- The user is now logged in and redirected to the original or dashboard page.
🔐 Key Components
| Component | Description |
|---|---|
| Client | Application requesting authentication (your website) |
| IdP | Identity Provider (e.g., Google, Okta, Azure AD, Auth0) |
| Authorization Code | Temporary code exchanged for tokens |
| ID Token | JWT containing user identity (sub, email, name) |
| Access Token | Token for accessing protected APIs (optional in basic login) |
| Redirect URI | URL on the client where the IdP sends the response |
✅ Benefits of OIDC Authorization Code Flow
- 🔐 Strong Security — Server-side token exchange avoids exposing tokens in the browser
- 🌐 SSO-Friendly — Works across apps with federated IdPs
- 📦 Rich Identity Data — Access user profile, email, and more
- 🔁 Refresh Tokens — Maintain sessions without re-authentication
- 🧰 OAuth-Compatible — Easily integrate with OAuth-protected APIs
🔚 Conclusion
OIDC’s Authorization Code Flow is the gold standard for secure, standards-based authentication in web applications. It offers strong security, flexibility, and compatibility with leading identity providers.
For more identity & access security tutorials, visit IDAMworks.com.